Christmas Tree Brownies
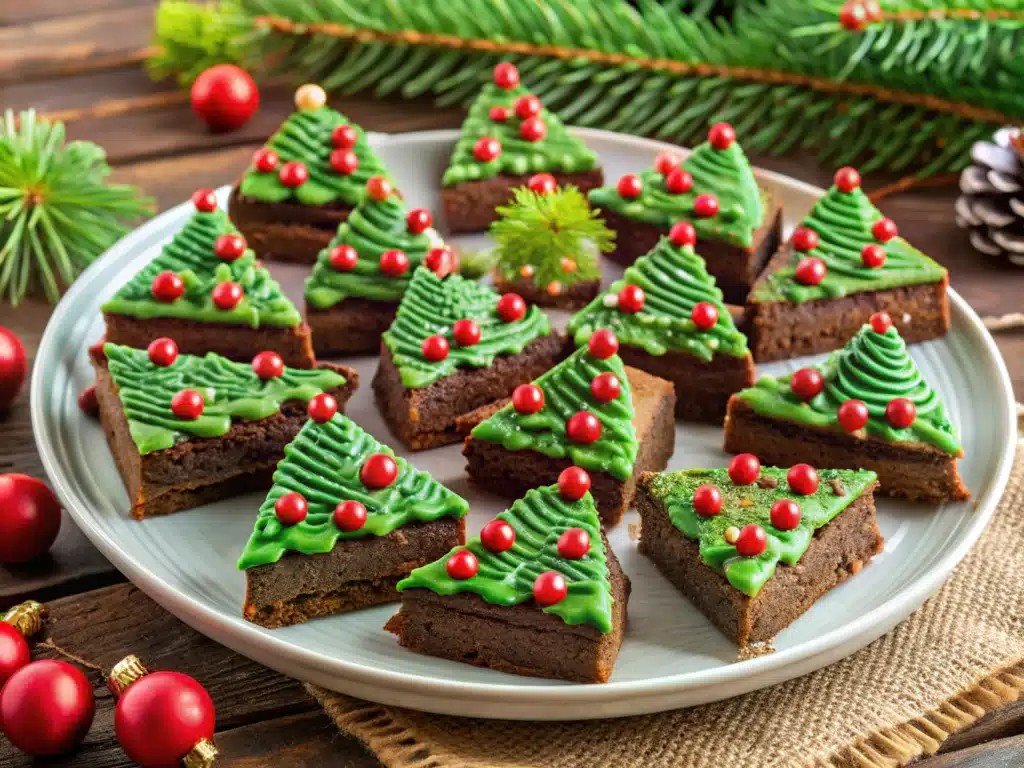
There is a particular kind of quiet that falls over a kitchen in December when a pan of brownies is in the oven. The chocolate smell drifts down the hallway, someone wanders in to ask how much longer, and by the time the timer goes off, there is already a small crowd waiting by the counter. These Christmas tree brownies take that everyday moment and turn it into something worth remembering. They start with a thick, fudgy brownie that is genuinely good on its own — dark, chewy at the edges, soft in the middle, with melted chocolate chips in every bite — and then they get cut into triangles and dressed up like little Christmas trees, with swirls of green frosting, a sprinkle of ornaments, and a candy cane trunk.
I have made these for school parties, neighborhood cookie swaps, and family movie nights, and they are always the first thing to disappear from the dessert table. Part of the charm is how they look, but most of it is that they taste like a real brownie, not a decoration project that happens to be edible. The frosting is a simple buttercream that pipes easily and sets just enough to hold the sprinkles in place, and the candy cane trunk gives each tree a handle that kids love to hold. If you have ever been disappointed by a cute holiday treat that looked better than it tasted, this is the recipe that fixes that.
What I like most is how forgiving the whole process is. You can bake the brownies a day ahead, cut them the next morning, and decorate them in about twenty minutes. If your triangles are not perfectly even, no one will notice once the frosting goes on. And if you are short on time, a good boxed brownie mix works beautifully here — the decorating is where the magic happens, and nobody at the party will ask whether you melted the chocolate yourself.

Recipe at a Glance
- Servings: 8 large trees (or 16 small trees if you cut each triangle in half)
- Prep time: 20 minutes, plus cooling
- Bake time: 28 to 32 minutes
- Decorating time: 20 minutes
- Total time: about 2 hours, mostly cooling
- Serve: at room temperature, on a platter lined with parchment
Why This Recipe Works
The brownie base is built for cutting and decorating. It uses melted butter and a mix of granulated and brown sugar, which gives you a shiny, crackly top and a chewy crumb that holds together when you slice it. Four eggs add structure without making the brownies cakey, and a full cup of cocoa powder keeps the chocolate flavor deep and dark, so the sweet green frosting on top tastes like a contrast rather than a sugar overload. A little baking powder lifts the batter just enough that the triangles are not dense bricks, and the chocolate chips folded through the batter melt into pockets that stay soft even after the brownies cool.
Chilling the baked slab before cutting is the small step that makes the biggest difference. Warm brownies crumble and smear; cold brownies cut into clean, sharp triangles with a wiped knife. The frosting is a classic American buttercream, beaten until fluffy, and it pipes best when it is soft but not warm. If it feels stiff, a teaspoon of milk fixes it. If it feels loose, a spoonful of powdered sugar brings it back. That is the whole secret: a sturdy brownie, a cold cut, and a frosting that behaves.
Ingredients
- 1 cup (2 sticks) unsalted butter, melted and slightly cooled
- 1 1/4 cups granulated sugar
- 3/4 cup brown sugar, packed
- 4 large eggs, at room temperature
- 1 tablespoon vanilla extract
- 1 cup all-purpose flour, spooned and leveled
- 1 cup unsweetened cocoa powder
- 1/2 teaspoon baking powder
- 1/2 teaspoon salt
- 1 cup semisweet chocolate chips
- 1 cup (2 sticks) unsalted butter, softened, for the frosting
- 3 cups powdered sugar, for the frosting
- 2 tablespoons milk, for the frosting, plus more as needed
- 1 teaspoon vanilla extract, for the frosting
- Green food coloring gel
- 8 mini candy canes, cut in half, for the trunks
- Assorted sprinkles, nonpareils, and small round candies, for decorating
- 1 small star-shaped sprinkle or candy for each tree top
A few notes on the ingredients: use a good-quality cocoa powder if you have it, because it carries most of the chocolate flavor here. Dutch-process cocoa gives a darker color and a smoother taste, while natural cocoa gives a slightly sharper, more classic brownie flavor — either one works. Room temperature eggs mix into the batter more evenly and help the brownies rise properly, so set them out while the butter melts. For the frosting, gel food coloring is worth using over liquid: it gives a strong, true green without thinning the buttercream. And if you only have salted butter, use it and leave out the added salt in the brownie batter.
How to Make It
- Heat your oven to 350 degrees F. Line a 9 by 13 inch baking pan with parchment paper, leaving a little overhang on the long sides so you can lift the brownies out later. Lightly grease the parchment and the exposed sides of the pan.
- In a large bowl, whisk the melted butter with the granulated sugar and brown sugar until smooth and glossy, about 1 minute. The mixture should look like wet sand turning into a thick syrup.
- Add the eggs one at a time, whisking well after each one until the batter looks smooth and slightly lighter. Stir in the vanilla extract. This is the step that builds the crackly top, so do not rush it.
- Sift the flour, cocoa powder, baking powder, and salt over the wet ingredients. Stir gently with a spatula just until no dry streaks remain. A few small lumps are fine. Fold in the chocolate chips. Do not overmix, or the brownies can turn tough and dry.
- Spread the batter evenly in the prepared pan and smooth the top with the spatula, pushing it into the corners. Bake for 28 to 32 minutes, until the edges look set and a toothpick inserted in the center comes out with a few moist crumbs clinging to it. If the toothpick comes out clean, the brownies are slightly overbaked.
- Let the brownies cool completely in the pan on a wire rack, at least 1 hour. Then chill the pan in the fridge for 30 minutes. This is what gives you clean cuts.
- Lift the cooled brownie slab out using the parchment overhang and place it on a cutting board. Trim off the very thin edges if you like, then cut the slab into 8 triangles: first cut it into 4 rectangles across the short side, then cut each rectangle diagonally to make 2 triangles. Wipe your knife clean between cuts.
- To make the frosting, beat the softened butter on medium speed until creamy and pale, about 1 minute. Add the powdered sugar a cup at a time, beating on low speed at first so it does not puff out of the bowl, then the milk and vanilla. Beat on medium speed until smooth and fluffy, about 2 minutes. Stir in green food coloring gel a few drops at a time until you reach a cheerful tree green.
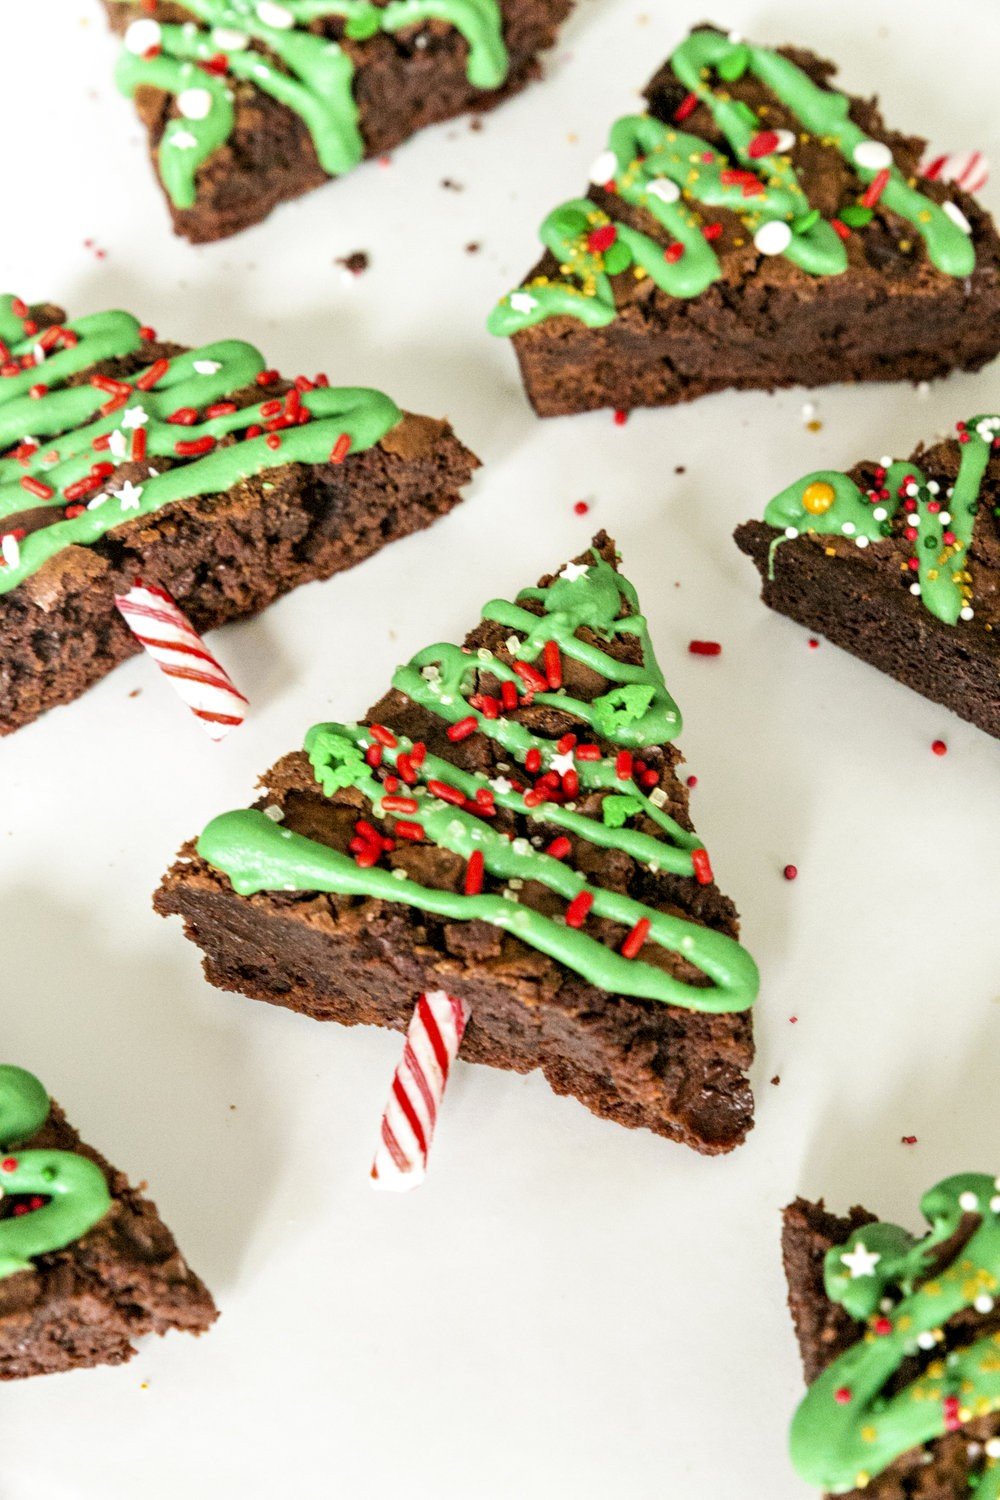
- Spoon the frosting into a piping bag fitted with a star tip, or into a zip-top bag with one corner snipped off. Pipe zigzag lines across each brownie triangle, starting narrow at the top point and getting wider toward the base, like branches. Leave a little brownie showing between the lines — it reads as shadow and makes the trees look fuller.
- Press a small star sprinkle at the top point of each tree. Add sprinkles and small round candies as ornaments, spacing them out so each tree looks decorated rather than crowded. Push a half candy cane into the bottom edge as the trunk. Let the frosting set for about 20 minutes before serving or stacking.
Tips for Success
The single most common mistake with brownies is overbaking them. Start checking at 28 minutes, and remember that brownies keep cooking in the hot pan after they come out of the oven. You want moist crumbs on the toothpick, not a clean one. If your oven runs hot, check at 26 minutes. For the cleanest triangles, use a long, sharp knife and wipe it clean between every cut; a damp paper towel works well for this. If the frosting feels too thick to pipe, add milk a teaspoon at a time until it flows smoothly. If it feels too thin and slides off the brownies, beat in powdered sugar a tablespoon at a time. Pipe the frosting the same day you serve the trees, if you can, so the swirls stay crisp and bright.
Variations
You can change the look of these trees without changing the recipe much. Swap the green frosting for white frosting dusted with green sprinkles for a snowy tree, or use red frosting with white sprinkles for a candy cane look. Stir a teaspoon of peppermint extract into the brownie batter for a mint chocolate version, and use crushed candy canes as the ornaments. For a nutty version, fold half a cup of chopped walnuts or pecans into the batter along with the chocolate chips. If you want smaller trees for a cookie tray, cut each triangle in half crosswise to make 16 mini trees, and use a smaller star tip for piping. You can also skip the piping bag entirely and spread the frosting on with a small spatula, then drag a fork through it to make branch lines — it looks rustic and charming.
Tips & Storage
These brownies keep well in an airtight container at room temperature for up to 3 days, or in the fridge for up to 5 days. If you stack them, put parchment between the layers so the frosting does not smear. To make them ahead, bake and cut the brownies up to 2 days early and store them covered at room temperature, then frost and decorate on the day you plan to serve them. They also freeze well unfrosted: wrap the cut triangles tightly in plastic wrap, place them in a freezer bag, and freeze for up to 1 month. Thaw at room temperature for about an hour before decorating. Serve them on a platter lined with parchment, with a little powdered sugar dusted around the edges like snow. They pair well with cold milk, hot cocoa, or coffee, and they are sturdy enough to pack into a cookie tin for gifting.
Frequently Asked Questions
Can I use a boxed brownie mix? Yes. Bake it in a 9 by 13 inch pan according to the package directions, cool and chill it the same way, and decorate as written. Choose a fudgy mix rather than a cake-style one so the triangles hold together.
How do I keep the triangles from crumbling when I cut them? Chill the baked slab for at least 30 minutes before cutting, use a sharp knife, and wipe the blade clean between cuts. A serrated knife works well if your brownies are very fudgy.
Can I make these ahead for a party? Yes. Bake the brownies up to 2 days ahead and store them covered. Decorate them the morning of the party so the frosting and sprinkles look fresh. Fully decorated trees keep in the fridge for 2 days.
What if I do not have a piping bag? Use a zip-top bag with one corner snipped off, or spread the frosting with a small spatula and drag a fork through it to make branch lines. Both look great.