Easy DIY Advent Calendar

This post may contain affiliate links. As an Amazon Associate I earn from qualifying purchases.
An advent calendar is one of those small December traditions that children remember far longer than the treats inside it. The excitement is not really about the chocolate or the toy — it is about the daily ritual, the little pocket to open, the countdown getting shorter, and the feeling that Christmas is coming, one day at a time. A shop-bought calendar does that job perfectly well, but a homemade one does something extra: it is made for the person opening it, with their favourite treats, their favourite colours, and little surprises that only you would think of.
This is a simple homemade advent calendar made from small paper bags or envelopes, hung in a row or clipped to a line, with a small treat or activity inside each one. It takes an afternoon to make, it needs no special tools, and it can be as plain or as decorated as you like. The version below uses 24 pockets, one for each day from 1 December to Christmas Eve, and the steps are written so you can follow them with a child helping beside you.

What You Will Need
You need 24 small containers, and small brown paper bags are the easiest choice — they are cheap, sturdy enough to hold a small treat, and easy to fold closed. Small envelopes work just as well if you prefer a flatter calendar, and small fabric pouches are a good option if you want a calendar you can reuse next year. You will also need number stickers or a marker for numbering the pockets from 1 to 24, and a length of string, twine, or ribbon to hang them from.
For decorating, gather coloured card, stickers, washi tape, and a hole punch. Wooden clothespins are the simplest way to attach each bag to the string — they hold firmly, they look charming, and children can unclip them easily each morning. You will also need scissors and glue for any paper decorations you want to add, and a roll of tape for fixing the string in place.
Then there are the fillers, which matter more than the bags. You need 24 small things, one per pocket, and the best approach is a mix: some small treats, some small activities, and some little notes. Think small and light, because a heavy pocket will pull the string down. Small wrapped sweets, a sticker sheet, a hair clip, a bouncy ball, a mini puzzle, or a handwritten note all fit. A good rule is that nothing in a pocket should be bigger than a matchbox, and nothing should be so heavy that it drags its bag off the line.
Before You Start: Plan the Fillers
The most common mistake with a homemade advent calendar is making the calendar first and then realising you have nothing to put in it. Plan the fillers first. Sit down with a piece of paper and write the numbers 1 to 24, then write one idea beside each number. This takes ten minutes and saves a lot of stress later.
Mix the days up so the excitement stays even. Do not put all the best treats in the first week, or the last week will feel flat. Alternate a treat day with an activity day: a small chocolate on Monday, a note saying “tonight we will watch a Christmas film together” on Tuesday, a sticker sheet on Wednesday, a note saying “today we will bake biscuits” on Thursday. The activity notes cost nothing and are often the days children remember best, because they mean time together rather than another sweet.
Think about who the calendar is for. A calendar for a young child needs soft, safe fillers — no small parts that could be a choking risk, and nothing with hard sweets. A calendar for an older child can have trickier puzzles, jokes, and challenges. A calendar for an adult works just as well with the same structure — tea bags, small soaps, a favourite snack, and notes with plans for the evening are all good choices, and the making is the same.
Step-by-Step Instructions
Step 1: Prepare your 24 bags or envelopes
Lay out your 24 bags or envelopes on the table and check they are all the same size. If you are using paper bags, fold the top of each one down by about 2 cm to make a neat cuff — this also makes the bag easier to close later. If you are using envelopes, leave them open for now. Number each bag clearly, from 1 to 24, using number stickers or a thick marker. Number them on the front, near the top, where the number will still be visible once the bag is clipped to the line. Double-check that you have all 24 numbers and that none is repeated — it is surprisingly easy to number two bags “12” and miss “13” entirely.
Step 2: Decorate the bags
This is the part children enjoy most, so let them lead. Add a sticker or two to each bag, a strip of washi tape along the cuff, or a small cut-out star or tree glued to the front. You do not need to decorate every bag in the same way — in fact, a mix looks better than a matching set. Keep the decorations flat, so the bags still hang neatly and do not catch on each other. If you are short on time, decorate just the front of each bag and leave the back plain. A good shortcut is to stamp or draw a simple shape — a star, a tree, a snowflake — on each bag in a different colour. It takes minutes and looks deliberate rather than rushed.
Step 3: Fill each pocket
Put one filler in each numbered bag, following the list you made earlier. This is the step where the numbering matters: the treat for 5 December goes in bag 5, not in whichever bag happens to be nearest. Work through the numbers in order, from 1 to 24, and tick each one off your list as you go. If a filler is a note, fold it small and tuck it in so it does not fall out when the bag is moved. If a filler is a sweet, keep it in its wrapper. Do not overfill a bag — if you have to force the top closed, the bag will tear when it is opened, and the treat inside may be crushed.
Step 4: Close the bags
Fold the top of each bag down twice and secure it. A small piece of tape works, a sticker works, and a staple works if you are careful not to staple through the treat inside. The fold needs to be firm enough that the contents stay in when the bag is hung upside down, but easy enough for a child to open in the morning without ripping the bag apart. If you are using envelopes, seal them lightly or tuck the flap in without gluing it, so they open easily. Test one bag by turning it upside down and giving it a gentle shake — if nothing falls out, the fold is good enough.
Step 5: Hang the line
Choose where the calendar will live for December. A wall in the kitchen or the living room works well, somewhere the child can reach the bags easily each morning. Cut a length of string or ribbon a little longer than the space you have, and fix it to the wall with small hooks, nails, or strong tape, pulling it taut. A piece of twine strung between two cup hooks looks lovely and holds well. If you have a lot of wall space, hang the bags in two rows of twelve; if space is tight, hang them in a single row of 24, or in four rows of six. Leave a little space between the bags so they do not crowd each other.
Step 6: Clip the bags to the line
Clip each bag to the line with a wooden clothespin, in number order from left to right. Clipping them in order matters, because a child will look for tomorrow’s number by counting along the line, and a jumbled calendar is confusing on a sleepy December morning. Make sure each clothespin grips both the bag and the string, and that the bag hangs straight rather than tilting. Step back and check the whole line: are all 24 bags there, are the numbers in order, and is anything hanging too low or too close to a radiator? Move anything that needs moving now, while the bags are still easy to unclip.
Step 7: Add a finishing touch
Add a small sign at one end of the line saying “Advent Calendar” or “Counting down to Christmas”, or hang a small star above the middle of the display. A few paper snowflakes or a short string of fairy lights along the wall makes the calendar feel like a decoration in its own right, not just a row of bags. Keep lights away from the paper bags, though — they should decorate the wall around the calendar, not touch it. Stand back, take a photo, and enjoy it for a moment before 1 December arrives and the opening begins.
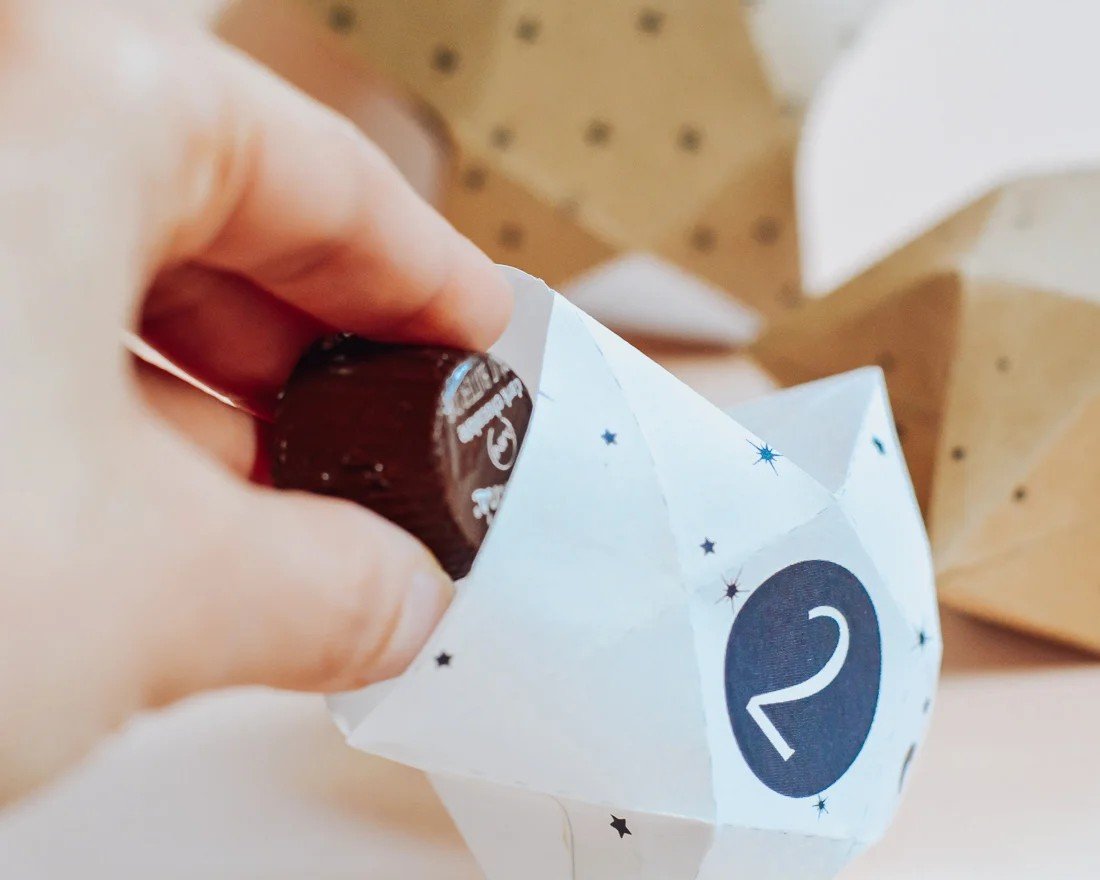
Filler Ideas That Are Not Just Sweets
If you want the calendar to feel special without filling it with 24 days of sugar, here are ideas that have worked well. For treats, try one small wrapped chocolate, a candy cane, a small packet of biscuits, a tea bag, or a piece of dried fruit. For activities, write notes saying things like “build a snowman from socks today”, “write a letter to Santa”, “make paper snowflakes”, “have hot chocolate after dinner”, or “choose a Christmas story to read tonight”. For small gifts, try stickers, a bouncy ball, a mini puzzle, a hair clip, a small toy car, or a packet of seeds to plant in spring. For older children, add jokes, riddles, and challenges — a riddle on a folded note costs nothing and often gets talked about at breakfast.
A useful mix for 24 days is roughly eight small treats, eight activity notes, and eight small gifts or surprises. That balance keeps the sugar reasonable, keeps the excitement up, and means the calendar is about more than just eating something each morning.
Variations to Try
If paper bags are not your style, the same idea works in other forms. Small envelopes pinned to a board make a flat calendar that fits on a door. Small boxes stacked in a pyramid make a calendar that doubles as a decoration on a sideboard. Fabric pouches hung on a branch make a rustic calendar you can reuse for years — just wash the pouches and fill them again next December. For a child’s bedroom, try hanging the bags from a low line they can reach without a chair, and for a classroom, make one calendar for the whole class with a group activity in each pocket, such as “today we will sing a Christmas song together”.
You can also make a calendar that counts down to something other than Christmas Eve. A 12-day calendar is a good choice if you are short on time or making one for the first time — twelve pockets is much quicker to fill than 24, and it still gives the same daily excitement. A calendar for the twelve days of Christmas, from Christmas Day to early January, works the same way, with the pockets filled after the main celebrations are over.
Frequently Asked Questions
How long does it take to make? About two to three hours, including decorating and filling, if you have the fillers ready. Most of that time is the decorating, so if you keep the bags plain and just number them, you can finish in about an hour.
Can I reuse the calendar next year? Yes, if you use fabric pouches or sturdy envelopes and open them carefully. Paper bags usually tear when they are opened, so they are best thought of as a one-year calendar. Keep the clothespins and the string, though — they will last for years.
What if I run out of filler ideas? Activity notes are the answer. A note saying “today we will go for a walk and look at the Christmas lights” needs no shopping and no wrapping, and children love them. Keep a list of free activities on your phone as you think of them through November.
Where should I hang it? Somewhere the person opening it can reach it easily, away from radiators, cookers, and open flames. A hallway wall, a kitchen wall, or the side of a bookshelf all work well.
For more ideas to put inside the pockets, our Christmas Kid Activities Bundle — $11 (regular price $14) is full of printable activities that work beautifully as advent fillers — cut an activity sheet into a pocket-sized piece, or slip a whole sheet in as a bigger surprise on a weekend day. It is a practical way to fill a calendar with things children will actually enjoy, rather than another handful of sweets.


