Christmas Handprint Crafts

This post may contain affiliate links. As an Amazon Associate I earn from qualifying purchases.
There is a reason handprint crafts survive every decluttering. Long after the glitter cards have been recycled and the paper chains have come down, the handprint stays — tucked in a folder, framed on a wall, or hanging on the tree in a slightly battered state. It is not the prettiest decoration in the house. It is the one with a date on the back and a hand that no longer fits inside it.
This guide is about making handprint crafts well, not just making a lot of them. It covers the choices that decide whether a print comes out crisp or smeared, which paint and paper actually work, how to handle babies, toddlers, and older children differently, and six signature projects in full detail — each one you can finish in a single sitting and keep for years. If you have never made a handprint craft before, start at the top. If you have made dozens, skip to the troubleshooting section: the fix for a smeared print is probably in there.
Choosing Your Paint
Paint is the single biggest factor in how a handprint turns out, and the differences between types are larger than most people expect.
Washable kids paint is the right choice for almost every handprint project. Washable kids paint is made to go on skin, it washes off with soap and water, and it dries in about fifteen to twenty minutes. The trade-off is that it is thinner than other paints, so white and yellow sometimes need two coats on the hand before they print boldly. If a colour looks faint on the first try, paint the hand again and press a second print on scrap paper first — that test print tells you whether the colour is strong enough.
Tempera paint, often sold in large bottles for schools, is thicker and gives a bolder print, but it can stain clothes and takes longer to dry. It is a good choice for classroom projects where children wear aprons and the prints need to look vivid on a display wall.
Acrylic paint gives the brightest, most durable finish, and it is the only paint I would use on a canvas or a wooden ornament that needs to last. But acrylic is not meant for young children’s skin: it dries fast on the hand, it is hard to wash off, and it ruins clothes. If you want an acrylic keepsake, paint the child’s hand yourself, press it quickly, and wash the hand immediately — or use the child’s hand to make a washable print first, then trace and fill it in with acrylic yourself.
Whatever paint you choose, avoid glitter paint for the hand itself. The glitter sits on top of the skin, prints patchily, and sheds everywhere for weeks. Add glitter afterwards, with glue, where you want sparkle.
Choosing Your Paper
Paper matters almost as much as paint. Thin printer paper buckles when wet paint goes on it, and the print wrinkles as it dries. It is fine for a quick card, but not for a keepsake.
Construction paper is the workhorse: it is thick enough to stay flat, it comes in Christmas colours, and paint grips it well. Its one weakness is that very dark construction paper can make light paint look dull, so test a print on a scrap first if you are using navy or black paper.
White card, around 200 gsm or thicker, is what I use for anything I want to keep — ornaments, framed prints, and cards that will be posted. It stays flat, it does not curl at the edges, and it survives being stored in a box for a year without bending.
Canvas boards, the small flat ones sold for children’s painting, are worth trying for one special print a year. Paint grips canvas beautifully, the finished piece looks like real art, and it hangs on a wall without a frame. They cost more than paper, so save them for the one print you most want to keep.
Setting Up So It Actually Works
A handprint session goes wrong most often before the paint even comes out, because the table is not ready. Set up like this and the whole thing takes half the time:
- Cover the table with newspaper or a plastic cloth, and put the paper you are printing on in the middle, taped down at the corners so it does not slide.
- Pour a small amount of paint onto a plate or a palette, not straight from the bottle — a bottle tips over, a plate does not.
- Put the brush, the wipes, and a damp cloth within arm’s reach before you paint the first hand. Once a hand is painted, you cannot walk away to fetch wipes.
- Have the child wear an old shirt or an apron, and roll sleeves up past the elbow. Paint travels further up an arm than you would think.
- Decide what you are making before you paint. A painted hand cannot wait while you discuss whether it should be Santa or a reindeer.
For babies, have a second adult. One person holds the baby steady and keeps the unpainted hand out of the way, while the other paints, presses, and wipes. Trying to do all of that alone with a wriggling baby is how paint ends up on the baby’s face, your shirt, and the sofa in the same minute.
The Press, in Detail
The press itself is a small skill, and it is worth learning properly because it is the same for every handprint craft you will ever make.
Load a flat brush with paint and brush it onto the palm and fingers in smooth strokes, going right to the edges of the hand. A set of paintbrushes for kids is ideal here — a flat brush about an inch wide covers a palm in a few strokes without leaving lines. Check the sides of the fingers and the heel of the palm — those are the places that get missed, and a print with a missing finger edge looks like a mistake even when everything else is perfect.
Place the hand flat on the paper and press each finger down gently with your free hand, starting from the palm and working outward. Hold it still for a slow count of five. Children like counting along, and the count stops them lifting early, which is the most common cause of a smeared print.
Lift the hand straight up, without sliding or wiggling. Then wipe the hand clean immediately, before the child touches anything. A painted hand left unwiped for even thirty seconds will leave fingerprints on the table, the chair, and anything else within reach.
If the print is faint in places, the paint was too thin or the hand was lifted too soon. If it is smeared, the hand moved during the press or the paint was too thick. Either way, press a second print on scrap paper before trying again on the good sheet — you will learn more from one test print than from three guesses.
Six Signature Projects, Step by Step
Santa on Canvas
This is the keepsake I recommend if you only make one handprint craft this year. You need red and white washable paint, a small canvas board, a flat brush, red paper, two googly eyes, a pink pom-pom, and white craft glue.
Paint the palm red and the fingers white, leaving the thumb bare. Press the hand onto the canvas with the fingers pointing down, so the white fingers form Santa’s beard and the red palm forms his face. Let the canvas dry flat for at least an hour — canvas holds paint longer than paper, and touching it early leaves fingerprints in the beard.
Once dry, glue a red paper triangle above the palm as Santa’s hat, stick on the googly eyes, and add the pink pom-pom as a nose. Write the child’s name, age, and the year on the back of the canvas in permanent marker. A canvas Santa like this hangs on a wall without a frame, and it looks intentional in a way a paper print sometimes does not.
Reindeer Family Portrait
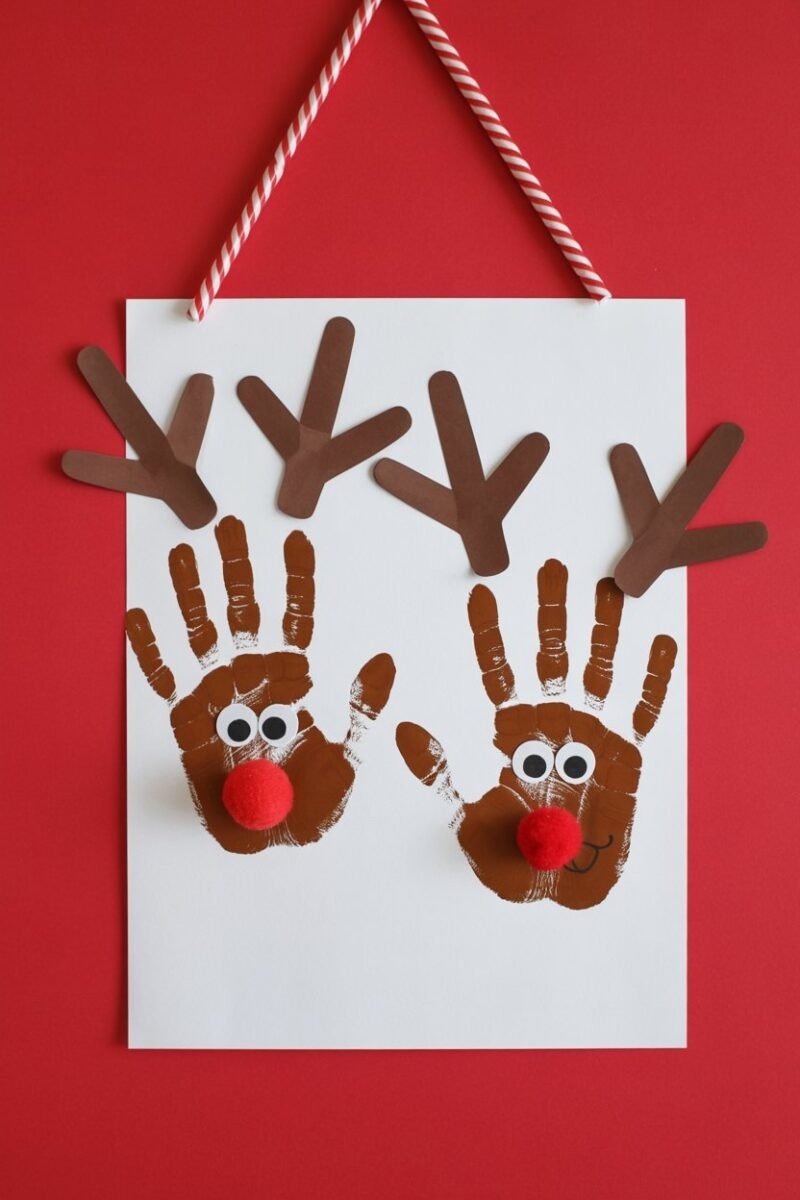
This one works best as a family project, and it needs a large sheet of paper, brown paint in two shades, googly eyes, red pom-poms, and a black marker.
Start with the largest hand and work down to the smallest, pressing each brown handprint in a row with the fingers pointing down. The fingers become antlers and the palm becomes the face. Leave a gap of at least a hand’s width between prints, or the antlers will tangle into each other.
When every print is dry, add googly eyes to each reindeer and give exactly one of them a red pom-pom nose. Let the children decide who is Rudolph — it is always a negotiation, and it is always worth it. Draw a smile on each face with the marker, and write each person’s name under their reindeer. Frame it behind glass if you can; a family portrait like this earns its place on a wall.
A Handprint Tree on a Canvas Bag
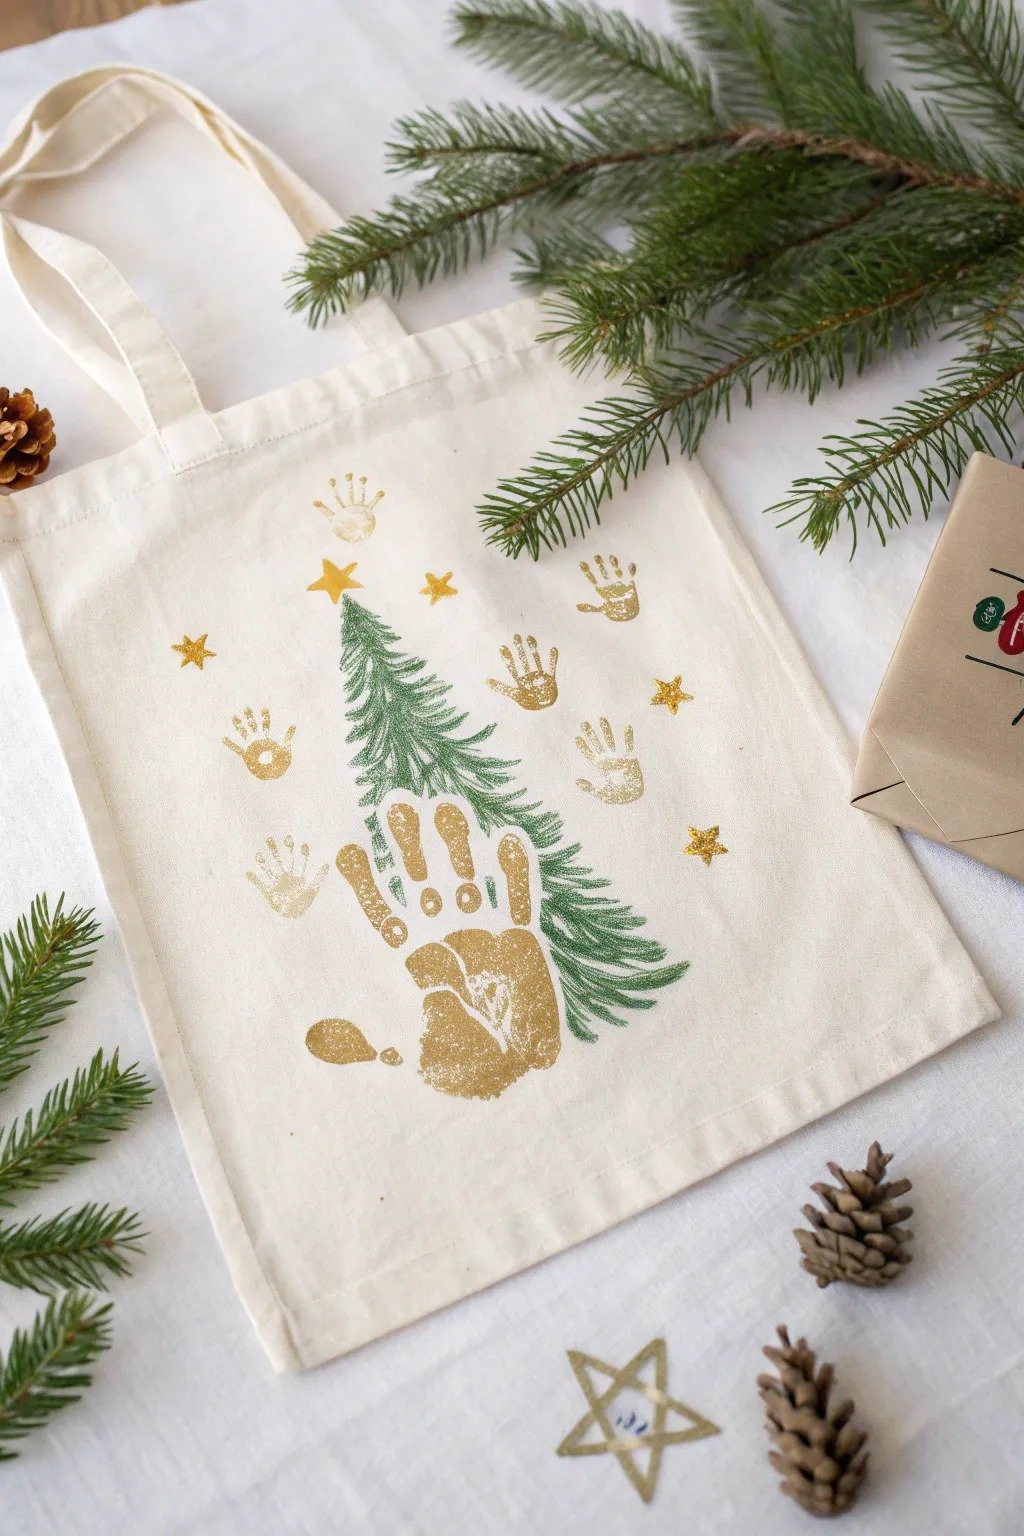
A plain cotton tote bag makes a surprisingly good handprint project, and the result is something you can actually use. You need green fabric paint or washable paint, a plain tote bag, yellow paper or fabric, and a flat brush.
Slip a piece of cardboard inside the bag first, or the paint will bleed through to the back. Paint the hand green and press it several times in a triangle — one print at the top, two in the middle, three at the bottom — with the fingers pointing up. Let the bag dry flat overnight, then iron it on a low setting through a cloth if the paint instructions say to heat-set it.
Add a yellow paper or fabric star at the top and a few fingerprint baubles in red and gold. A tote bag like this makes a lovely gift bag for Christmas presents, and it is sturdier than wrapping paper for heavier gifts.
Handprint Wreath for the Front Door
A wreath made of handprints is one of the prettiest things you can make with a child, and it is forgiving in a way a single print is not — one imperfect print disappears among nine good ones.
You need green paint, a large sheet of thick card, red paint, a red paper bow, scissors, and glue. Lightly draw a circle on the card in pencil, then paint the hand green and press it around the circle, overlapping each print by about a third, until the circle is complete. You will need eight to ten prints.
Once dry, add red fingerprint berries scattered around the wreath and glue a paper bow at the bottom. Cut the wreath out around the outer edge of the prints and hang it on the door with a ribbon loop. Because it is card rather than paper, it will survive a few weeks on a sheltered door — but bring it inside in rain, or the paint will run.
Angel Wings Keepsake
Angel wings are a beautiful print for a baby’s first Christmas, because the print is the whole picture. You need white or gold paint, a sheet of dark blue or black card, a gold marker, and glue.
Paint the hand white or gold and press it twice, side by side, on the dark card, with the fingers pointing outward and slightly upward. Those two prints are the wings. Once dry, draw a small halo above the gap between them with a gold marker, and write the child’s name and the year underneath.
The dark background is what makes this one work — white wings on white paper disappear, but white wings on navy card look striking. If you only have white paper, paint a dark background first and let it dry completely before the handprints go on.
Handprint Stocking for the Mantel
Cut a large stocking shape from red or green felt, or from thick card if you do not have felt. Press a white handprint onto the stocking in white paint, then glue cotton balls along the top edge as the fluffy cuff and add a ribbon loop for hanging.
Felt needs white craft glue, not a glue stick, and the handprint needs to dry flat for several hours — felt absorbs paint slowly and the print stays tacky for longer than it does on paper. Hang the finished stocking on the mantel or on the tree. It is a decoration, not a stocking for filling, but children love seeing their own hand on the mantel all December.
Displaying, Storing, and Gifting Handprints
A handprint that is stored well will still look good in ten years. One that is folded into a drawer will not. Store keepsakes flat, with a sheet of tissue paper between each one, in a folder or a shallow box. Write the name, age, and year on the back in pen — pencil fades, and a handprint without a date loses half its meaning.
For display, frames with glass protect the best pieces from dust and from small hands. Ornaments made from thick card can be hung on the tree year after year if you store them in tissue paper in a rigid box, not loose in a bag with heavier decorations.
Handprint gifts work best when you make two prints on the same day: one to keep, one to give. Grandparents, godparents, and aunts and uncles treasure a handprint far more than anything from a shop, and a framed print with the year on it is a gift that needs no wrapping paper explanation.
Troubleshooting: What Went Wrong and How to Fix It
The print is faint or patchy. The paint was too thin, or the hand was not fully covered. Paint two coats on the hand before pressing, and check the edges of the fingers before you press.
The print smeared. The hand moved during the press, or the paint was too thick. Use a thinner coat, hold the hand still for a count of five, and lift straight up.
The paper buckled. The paper was too thin for the amount of paint. Use construction paper or card next time, and tape the paper down at the corners before printing.
The paint cracked as it dried. The paint went on too thickly, often because the hand was dipped rather than brushed. Brush it on in a thin, even layer.
The colours mixed into mud. Two wet prints overlapped before the first was dry. Wait a few minutes between overlapping prints, or use a hairdryer on a cool setting to speed up drying.
My child will not keep their hand still. Do not fight it. Paint the hand, press it quickly while they are distracted by counting or a song, and accept a wobbly print. A wobbly print made happily is worth more than a perfect print made through tears.
Frequently Asked Questions
What age is best for handprint crafts? Any age works, but the approach changes. Babies need an adult to do the painting and pressing. Toddlers can press with help and choose colours. Preschoolers can do most of it themselves. Older children can design whole scenes around a print. There is no age that is too young or too old — only a method that needs adjusting.
Is washable paint really washable? On skin, yes, with soap and water. On clothes, usually, if you wash promptly in a normal wash. On fabric like a tote bag, it will fade in the wash, which is why fabric paint is better for anything you plan to launder. On furniture, wipe it up while it is wet; dried washable paint needs scrubbing.
How do I stop the paint staining my table? Cover the table before you start, not after the first spill. Newspaper works, but a plastic cloth is better because paint soaks through newspaper eventually. Keep a damp cloth on the table throughout the session for instant wipe-ups.
Can I make handprint crafts in a classroom? Yes, and they work well in groups if you prepare. Pre-cut the paper, pour paint into individual plates, and have one adult per table doing the painting while another wipes hands. Thirty children painting their own hands at once is chaos; a small rotation system is calm.
More Christmas Fun for Kids
Handprint crafts are a lovely way to spend a December afternoon — and if your children enjoy colouring too, there is plenty more festive fun waiting for them.
Get the printable version in our shop: Christmas Coloring Pages — $3 (regularly $5). It is full of Christmas pictures to colour all December long.